What is a pick and place machine anyway?
A pick and place machine puts the components on circuit boards at assembly phase. Typically these machines are used for surface mounted devices (SMD). The LitePlacer is unique because it is the first affordable desktop machine aimed for prototype boards.
Who is this machine for?
For developers, hackers, makers, advanced hobbyists, anyone who assembles electronic circuit board prototypes!
Do I need one?
Yes. If you build SMD prototype boards more than a few a year, I believe you need one. If you have trouble with small components such as 0603s or 0402s, you also need a machine.
If you are building complex prototypes with a few hundred components, you also need a machine, unless you are very fast by hand placement. Remember, the paste typically dries out in three or four hours after placement. All things add up and it is hard to do better than about 100 components per hour on a new board, unless it is something like a LED matrix, where most components are of same type and same orientation.
But to be honest, if your typical board is 20 passive components and one IC, hand soldering is a viable option.
Of course, if you just want to have a cool industrial desktop robot, I’m happy to sell you a kit!
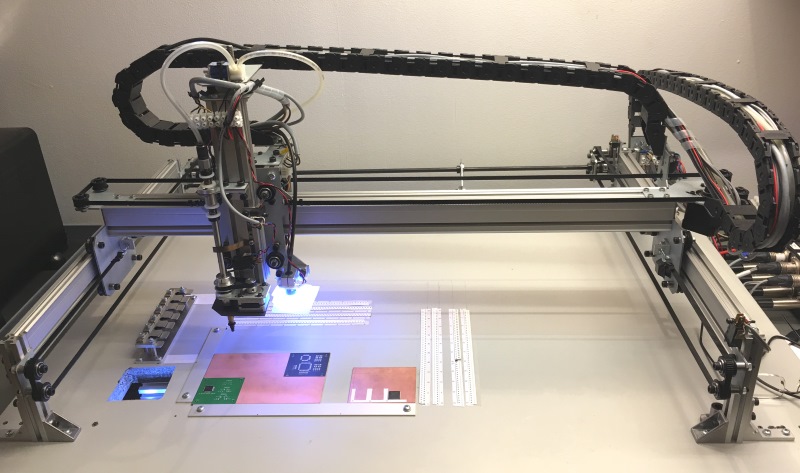
What does it look like?
Courtesy of Elektor Magazine, there is also a photo gallery about the mechanical build.
Is it easy to operate?
Yes, here you can find an older video, where I start the machine, load a placement file, define the component locations on the work area and place components on a small demo board: LitePlacer introduction video
What size it is, how big is the work area?
The size of the machine on the table is about 92 x 54 cm. Depending on the cable management solution, there might be some overhang; because of those, this machine needs roughly 100 x 65cm space overall.
The usable work area is about 570mm x 370mm. You need to fit your board and your components to this. The fully featured work area, reachable by both the camera and nozzle, is about 495mm x 340mm.
The size is not limited for any particular reason. If you need a bigger or smaller machine, there is no reason why you couldn’t use different length rails. If you change the width of the machine, you also need different length drive shaft and aluminium extrusion in the back, but these are readily available parts. By special order, custom size machine kits (with some restrictions) are available with little or no extra cost. Please contact me!
What is this machine capable of, what it can do?
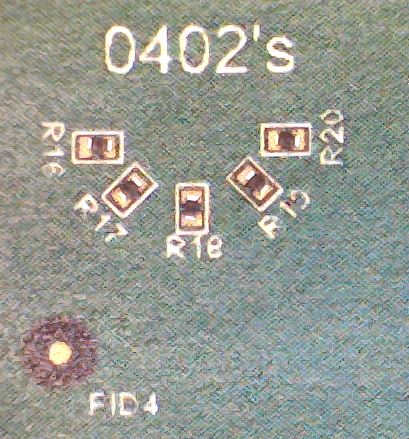
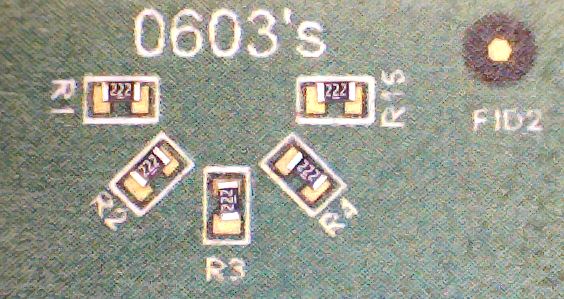
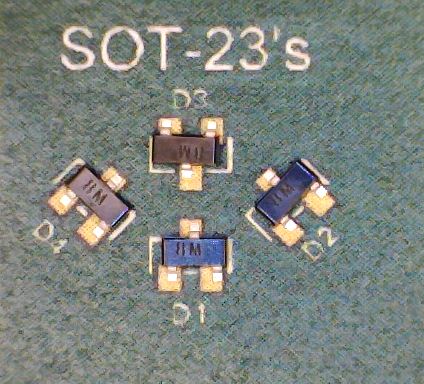
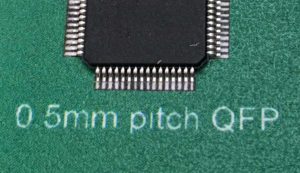
The machine can reliably and repeatable place passive components down to 0402, SOT-23 diodes and 0.5mm pitch ICs, as well as other components with similar accuracy requirement. Here are some examples. A laser printed image of a circuit board was used in this test instead of a real board – sorry for the crappy “board” image quality! Click for a bigger image:
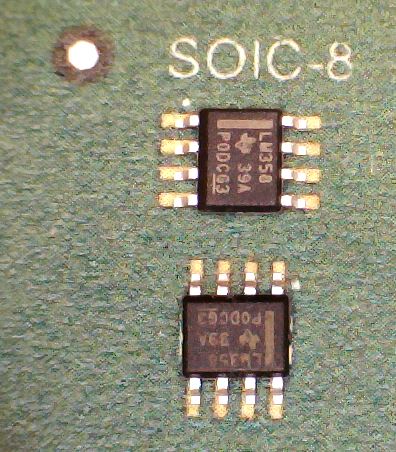
It can also place loose components in the SOIC accuracy level using optical part position recognition:
Accuracy is good enough for small pitch ICs.
Where are the limits?
There are limits, it can’t do 0201s. (I haven’t found a suitable nozzle that is small enough.)
Also, as a prototype building machine, this is not very good for a production machine. First, it does not support feeders. This means that you can only use as many components as you can fit on your table, although that is a lot. Also, it is not super fast, only up to about 500-800 components per hour.
What is included in the kit?
The kit includes:
- All mechanical parts, packed and labeled
- TinyG controller
- USB cameras, LED ring lights
- Stepper motors
- Belts and pulleys
- Vacuum pump, valve and tubing
- Limit switches, FETs for pump and valve control
- Set of nozzles and the holder for them for automatic change
- Light diffuser and shade materials
What is not included in the kit?
The items not included in the kit are those that a typical kit builder is likely to have already or where adding them would not add value to the product, only overhead and shipping costs:
- Power supply: 24V DC, >5A required, >8A recommended.
- Cables and wires. Please see this page for cables and wires you need for the build; the TinyG USB cable is of type B (square end).
- Connectors, termination blocks, ferrules and other cabling accessories (please see this page for suitable accessories for wiring)
- Cable chains or other cable management
- Enclosure for electronics (optional, but looks nice)
- Reset/kill/safety switch and its mount (please don’t omit to have one in your build!)
- Work table, screws to secure to machine to it
- PCB guide strips shown in some photos
- Computer (see below)
- Tools (please see Preparatory Step 1: Collect the Tools)
What else do I need?
The software runs on a Windows computer. It is not very demanding; it is tested on Windows 7, 8 and 10, but I see no reason why it wouldn’t work on older machines. Notable computer requirements are:
- 3 USB ports*
- OS support for web cams
- Display resolution 1280×960
*: There needs to be two USB controllers or a built-in hub to prevent the slow controller connection reducing the bandwidth of all USB connectors. If not, you need an arbitrating USB hub. I’ve had good experiences with Belkin brand.
To build SMD boards, a pick and place machine alone is not sufficient. First, you need a CAD system that can produce a suitable pick and place file. All PCB design programs will output the necessary data at some format, but it might be possible that you need to find a way to make the format compatible. See LitePlacer Input File Format.
You also need solder paste, a stencil and a way to print the paste on your board. Solder paste is sold in most electronic stores. In most cases, you can buy the stencil from the same place you get your circuit boards. You can also order a stencil separately. A stencil should cost less than $20. There are specialized machines for solder paste printing, but I find that you can get very good results manually, you only need a squeegee and some spare PCBs to form a jig. See (link tbd) for instructions.
And finally, you need an oven and a controller. The oven does not need to be fancy, even a simple pizza oven is adequate as a starter level oven. The only important thing is that it gets hot enough fast enough, is big enough for your boards and can be externally controlled. The last item only means that there are no built in electronic heat controls; the cheap, timer based ovens are best. The controller is important: For good results, you need the oven to follow the paste recommended temperature vs. time profile. (I am happy with an earlier version of this oven and controller, although the oven is about as basic as it can be. More fancier (and expensive) products are plenty (search for a reflow oven). DIY solutions can be found also.
