Hi Tek,
1) I have the box configured for the downcam, but when I alter the zoom obviously the size of the box changes. Is this taken into account automatically when you zoom in or is there something I else I need to do? I've tried running the process with zoom at 1.0 and it made no difference to the outcome however so I doubt that's the issue.
How accurate does the box measurement need to be. If it's out by, say, 0.2mm, is that going to be a problem?
I am not sure it does change, as the box also increases in size when you do that - doesn't it? I took the measurements with Zoom 1x and never had a problem afterwards.
For homing, it just needs to be in the correct range - so if it is a bit off that does not create a problem.
However, for part pickup you want this measurement to be as accurate as possible.
Another user, thereza is working on ehancements to the software to automate the calibration. Basically, his algorithms move the gantry by a known distance away from an optical mark and measures how many pixels the mark moved in the picture to figure out the ratio.
You can do the same manually:
1) Put a ruler on the table and align with Y-axis
2) Move gantry so that the left box boundary is exactly above the edge of the ruler
3) Note X-position
4) Move gantry to the right until the box boundary on the opposite side is exactly above the edge of the ruler
5) Subtract noted x-position from current x-position and you know the box size
6) repeat for Y axis
Depending on the height of your component tapes and / or additional trays underneath, there might be a perspective error as described here:
http://liteplacer.com/phpBB/viewtopic.p ... rt=20#p350
I have a different, higher-resolution camera system. I think with the kit cameras this effect will not be as significant. Just make sure to measure the box size at the right z-level

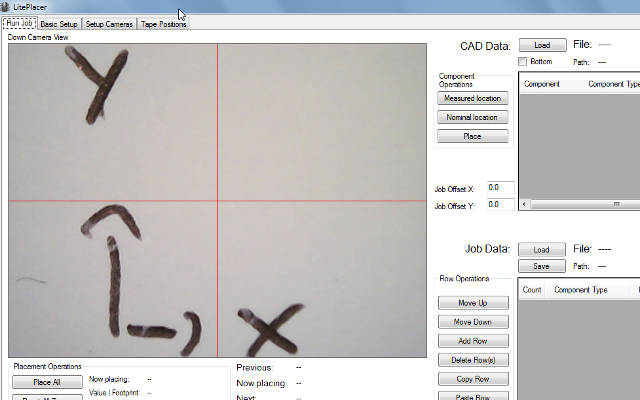
2) With regards to orientation, I'm a little confused. When I move the gantry left, the image moves to the right, and when I move it up, the image moves down. Can you confirm this please?:
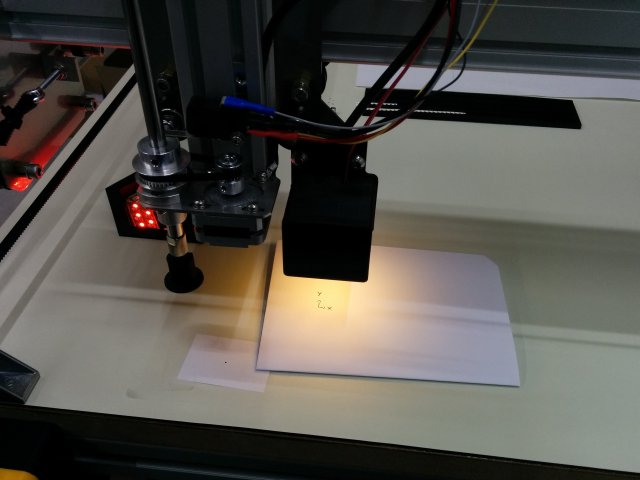
Just noticed my terminology is confusing, sorry about that. See the following pictures - these should make it clear:

- Note the small arrows for X and Y on the paper
- cam_orientation_1.jpg (35.93 KiB) Viewed 9086 times

- LitePlacer software should display it like this
- cam_orientation_2.jpg (29.74 KiB) Viewed 9086 times
3) The dot is about 7mm to the right and up from the XYZ location. Is that okay?
In my case it is a little closer, like 2 mm up and 2 mm right - but as long as it is in the camera picture after mechanical homing (machine tripped limit switches), it should be allright.
As an aside, we didnt realize this particular surface would be so rugged. From the above image, can you tell if this is likely to be an issue later on?
I have a similar problem. My table surface also has a relatively rugged structure. Juha mentions in the build instructions that the surface should be smooth, but I must have missed that part

While the structure makes computer vision harder due to creating pattern noise, it has not been a problem for me so far. Around the optical homing mark, I put a sticker (self adhesive paper) with smooth surface large enough to cover camera field of view.
For component strips and single component pickup, I use custom trays anyways. If you run into problem with sprocket hole detection, putting a strip of paper or other smooth surface underneath them would probably help.
For fiducial detection it is no issue at all as the PCB covers the table surface anyways.
Out of curiosity: What material is your table surface?


