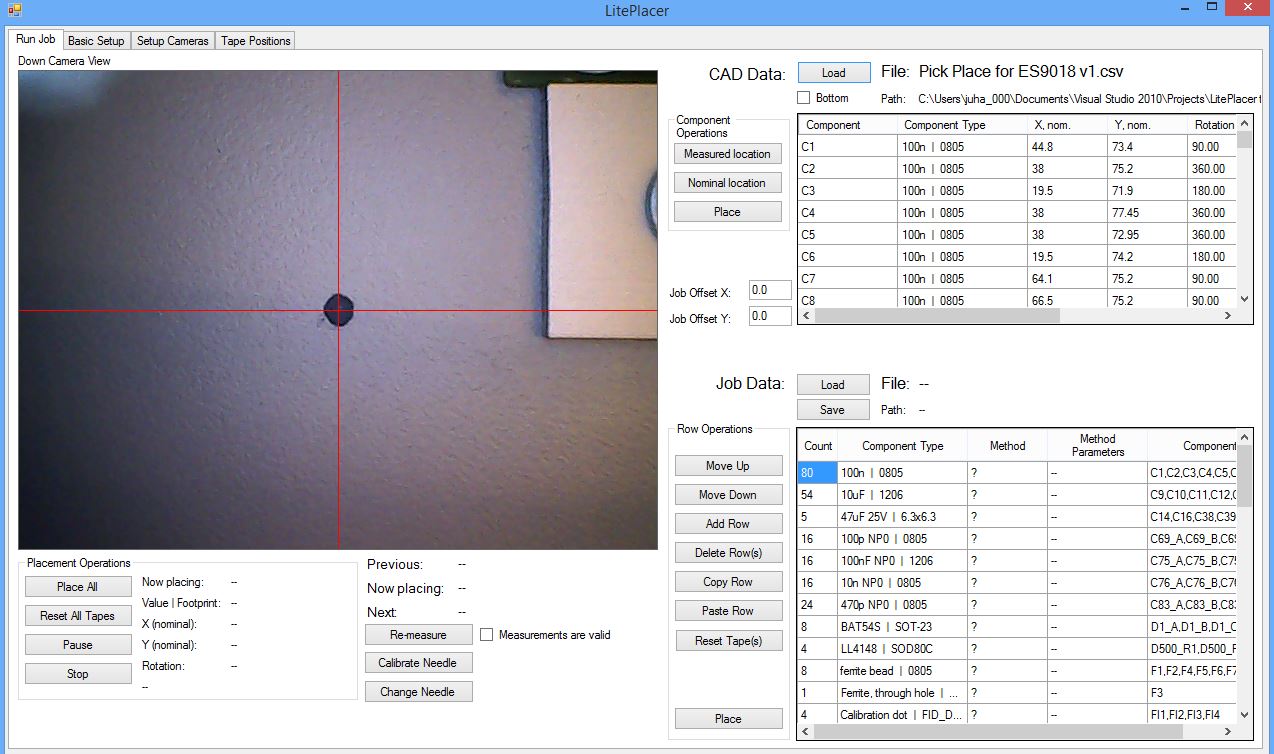
You will do the placement work at the “Run Job” page in the control program. Here is a screenshot of the page, right after loading a pick and place file (Click for a full size version):
CAD Data Section
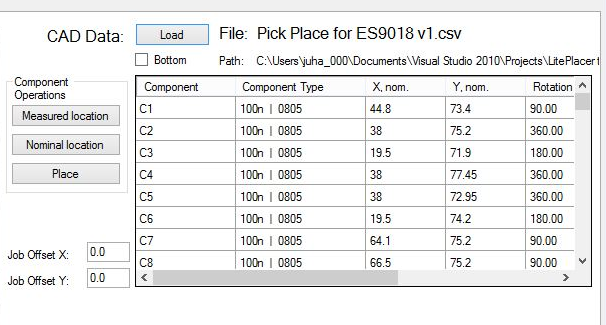
The pick and place file is loaded in the upper right “CAD Data” section:
The content of the pick and place file is shown in the table. The “Component” column has the designator/name of the component, the “Component Type” column shows the value/footprint combination and the other columns the nominal placement coordinates and rotation. Not visible (unless you scroll the view) are the measured part location, in machine coordinates.
On the side of the table are buttons for operation that you can do to a single part:
“Measured location” button will center the view on the true, measured part location. This should be exactly on top of a part. The “Nominal location” button will center the view on the nominal location, with only the position correction applied. This will not be accurate. And finally, there is a “Place” button, that you can use to place a single component.
If your CAD data origin is not at the lower left corner of the PCB, you must use the “Job Offset” boxes for correction.
Job Data Section
The “Job Data” section below the CAD data shows a summary of the CAD data. As you can see, in the above example the CAD data start with 100n/0805 capacitors. In the Job data table, all the 100n/0805 capacitors are collected on one row. Most of the work is done with this section, and explained on the Job Data Table page.
Measurements and Calibrations
Below the camera image are labels indicating what the machine is doing at the moment, as well as buttons for re-measuring and needle control. The “Re-measure” button re-runs the measuring algorithm: First, the fiducials are recognized from the data (usually automatically; if ambiguous, the system will ask for advice), then their exact positions are measured. The system expects to find them close to their nominal location (see above). Finally, a coordinate change transform is built and run to find the machine locations of the parts. The “Measurements are valid” checkbox tells the programs opinion about if re-measuring will be necessary. If the motors are de-energized, you change the board position (like take it for examination and replace) or some other reason you think the measurements are not valid anymore, redo them.
The “Measure Needle” (in the old screenshot above, “Calibrate Needle) re-runs the needle wobble measurement routine using the up-looking camera. The needle tip wobbles somewhat when it rotates; this function measures the wobble so that it can be taken in to account when placing.
The “Change Needle” button allows for manual needle change. It will de-energize the motors so that you can move the machine and rotate the pick-up needle. It also deactivates the needle switch. When you indicate that needle change is done, the machine will re-home and re-measure.
Placement Operations
The “Placement” Operations section below the camera image on the left side are for controlling the operations for all components. The “Place All” button goes through the Job Data table and does all the operations. The “Pause” button stops the run to be restarted later and the “Stop” button aborts a whole job in case of a serious malfunction. The “Reset All Tapes” sets all tape positions to use the first part. (This is not very useful and I’m considering removing it.)
