On this page, you set up the cameras:
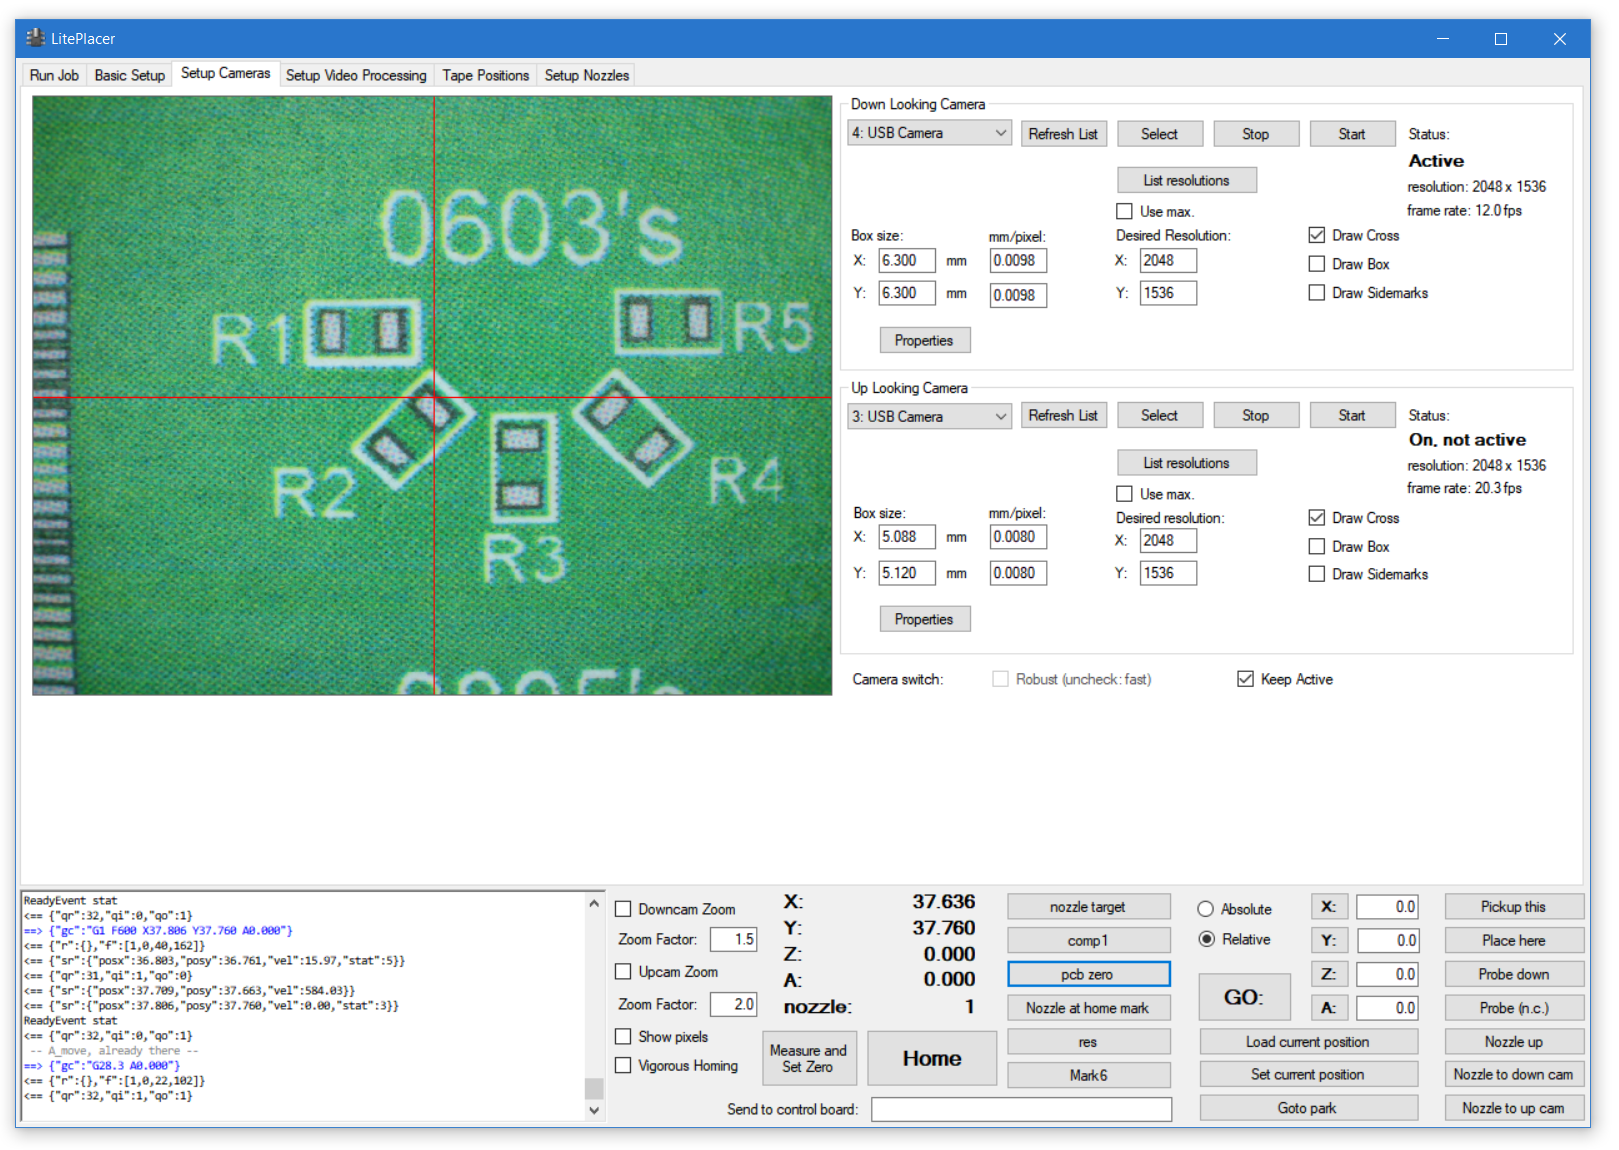
Please note, that on this page, nothing happens automatically, otherwise solving camera issues could be difficult. if needed, you have to stop, start and do changes explicitly.
For each camera, you have this box:

The drop down list contains list of all USB cameras connected to your system, with a number.
“Refresh List” button repopulates the drop down list.
“Select” brings this camera feed to the image box on the left.
“Stop” stops the camera view; “Start” restarts it. If you just connected a camera, you might need to use these buttons.
On the right, the camera status is shown.
The software needs to know how much physical distance one image pixel represents in the real world. On “Box size” boxes, you input the physical size of the calibration box. Please see this page for details.
“List resolutions” button lists the available camera resolutions to the log window. “Use max.” will use the camera maximum resolution; this is based on x size. Some cameras will have better frame rate with lower resolutions, so you can put your desired resolution to the appropriate boxes.
The “Properties” button opens a dialog which allows you to disable camera automatic exposure and tune it to your desired value. See this page for details.
“Draw cross” enables/disables drawing the aiming red cross on the image (shown above).
“Draw box” draws the calibration box on the image that the “Box size” function needs.
“Draw Sidemarks” draws small ticks on the side of the image. These represent 10cm of machine size. These help in navigation on ctrl+click function: When you do ctrl+click on the image, the image area is taken to represent your machine work area, and ctrl+click takes the machine to the corresponding spot. For example, ctrl+click on the center of the image will take the machine to the center of your physical work area.
“Properties” button opens a dialog, where you can set the camera properties:
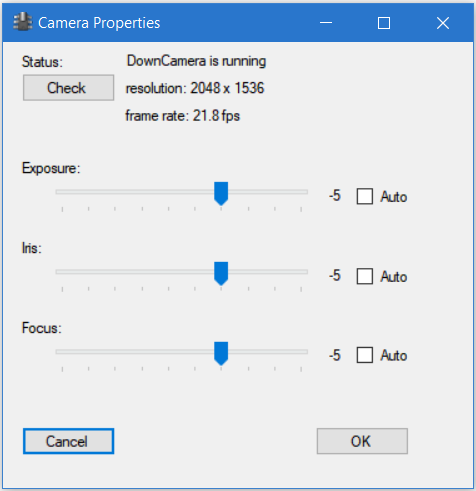
Here you can set some camera properties. Please note, that with standard LitePlacer cameras, the iris and focus are fixed, the controls don’t do anything. (I leave them visible for people who might have fancier updates.) However, disabling automatic exposure is useful. This makes the video processing system more robust, as the video stream properties stay more constant.
Note: Clicking on the image will move the camera to that spot. The move is approximate, the software doesn’t do triangular adjustment.
Camera switch & troubleshooting:
Please see this page for details and troubleshooting tips.