You already set the Up camera location. In the same box, there are a couple of other special locations:
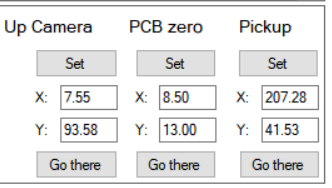
PCB zero
Locating the component target positions for placement happens as follows: Your PCB has alignment marks called fiducials (pads can also be used). The CAD data file (also called pick and place file, location file or similar) has coordinates for all your parts as well as for the alignment marks. The software locates the true position of the alignment marks and based on their CAD coordinates, calculates the transform from CAD coordinates to machine coordinates for other components.
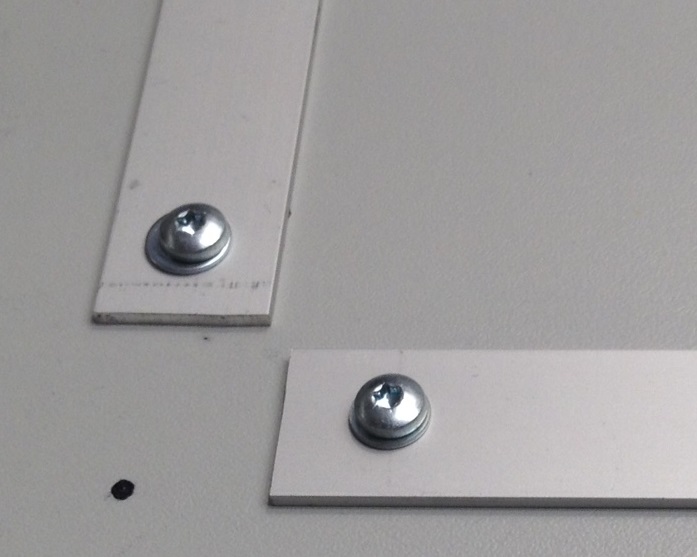
For this system to work, the system needs to find appoximate location the alignment marks. For this, you need to place your PCB on the work surface to a known position. It is helpful to place some kind of guides on your table for this; here is mine (I have a better homing mark nowadays, though):
The simplest and most comman case is to have the coordinates from your CAD system having the origin at lower left corner of the PCB, with increasing values to right (X) and up (Y).Therefore, the jig low left corner is called “PCB zero”:
Move the camera at the jig origin:

Press “Set” under the “PCB zero” label.
Pickup
When you are placing loose part with optical part position lookout, the machine will search the part from “Pickup” position. Take the camera above the position you want to use for this function and press “Set” under the Pickup label.
Bookmarks
On “Basic Setup” page, low right, there are six buttons labeled “Set Mark x” (x= 1 to 6) with six boxes labeled “Name”. On the bottom section, there are six corresponding buttons:
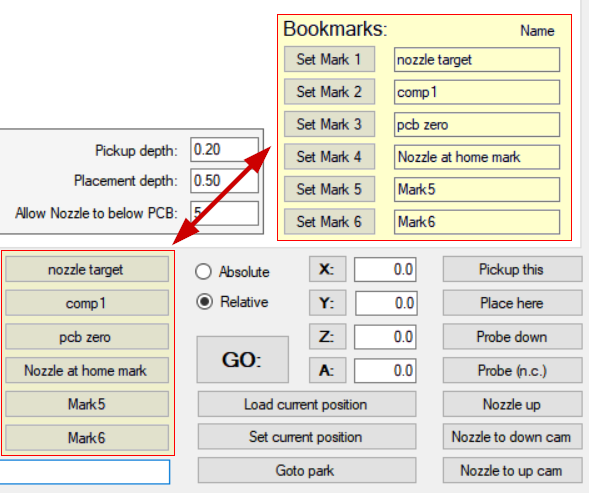
To set a bookmark, click a “Set Mark” button or ctrl + click the “Goto bookmark” button on the bottom section. To rename the bookmark, write the name on the box. The new name also goes to the corresponding “goto bookmark” button at the bottom section.
To move the machine to a bookmark, click the button on the bottom section.
Next (Automatic Nozzle Change Setup)